Installation from remote ansible
This type of intallation implies that the download of the project from the repository and the execution of the installation script is performed since the sysadmin workstation, due to since it is based on Ansible the installation is viable this method.
The main advantaje of this option is that the sysadmin can install and maintain several instances of OMniLeads from a single “deployer” node.
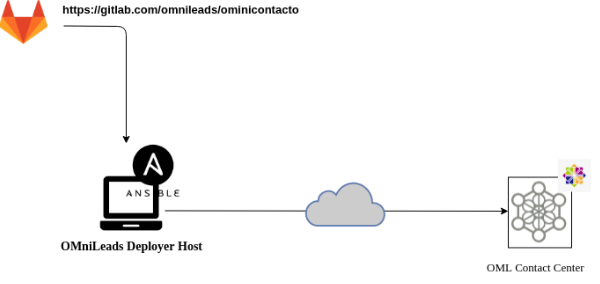
Figure 1: remote ansible install
Pre-requirements:
- A GNU/Linux CentOS 7 instance (minimal), Debian 9 (netinstall) or Ubuntu Server 18.04
- 20 GB of disk space
- 4 GB of RAM memory
- It is very important to leave the time correctly set on the host.
- Configure an IP address and a fixed hostname in the destination host of the installation.
Preparation on the machine that executes the remote installation:
- We must have the git package to clone the project repository then and select the release to install.
CentOS:
yum install git
git clone https://gitlab.com/omnileads/ominicontacto.git
cd ominicontacto
git checkout master
- Install kernel-devel package, update the SO and reboot the machine
yum install kernel-devel -y
yum update -y
reboot
Important
After the reboot is very important to check that the kernel-devel package coincide with the kernel shown by the command uname -a
- We must be sure of counting with a public password generated in the folder /root/.ssh/
code content
sudo ls -l /root/.ssh/
It is possible that we already have a public password (id_rsa.pub), as appreciated on figure 1.

Figure 1: ls -a /root/.ssh command output
In case of not having one, it can be quickly generated with the following command:
sudo ssh-keygen

Figure 2: ssh-keygen command output
This command generate our password id_rsa.pub previously mentioned.
- We check the IP address and hostname that the destination host of the installation owns, to then adjust the file inventory that we use when taking the installation parameters.
hostname
ip a

Figure 3: hostname command output
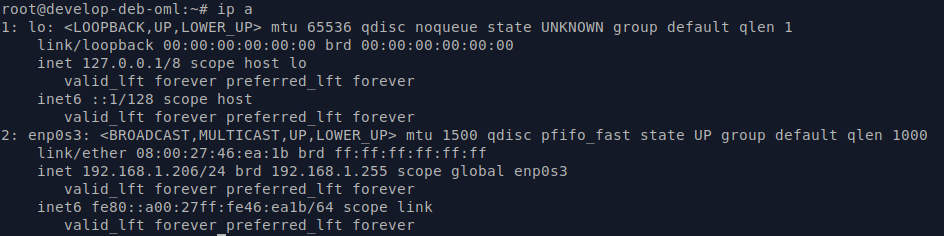
Figure 4: ip a command output
Preparation of the file inventory:
- In this step you must work in the Inventory file file available in this folder of the repo “PATH/ominicontacto/deploy/ansible”.
Note
OMniLeads uses ansible to perform the installation, therefore there is a “inventory file” that must be modified according to the parameters of the host we are working on.
Uncomment the second line, replacing the parameter X.X.X.X with the IP addres of remote host (where is going to be installed OMniLeads)
##########################################################################################
# If you are installing a prodenv (PE) AIO y bare-metal, change the IP and hostname here #
##########################################################################################
[prodenv-aio]
#localhost ansible_connection=local ansible_user=root #(this line is for self-hosted installation)
10.10.10.100 ansible_ssh_port=22 ansible_user=root #(this line is for node-host installation)
Then, in the same inventory adjust the Passwords and parameters of the instance
Once adjusted all the parameters in inventory file, you should execute the installation script
Executing of the installation script:
The installation of OMniLeads is done using the script deploy.sh, located within the folder deploy/ansible respect to the root file of the project (omnicontacto).
Once configured the mentioned variables, we proceed with the execution of the installation script (using sudo).
sudo ./deploy.sh -i

Figure 9: remote root password
The difference with respect to the ‘Self-Hosted’ installation, is that the script asks the password of the user root of the destination host of the installation.
The installation time Will depend mostly of the internet speed conection of the host on which the OML deplot is running, since some packages corresponding to the different components of the systme must be downloaded, installed and configured.
If the installation execution ends succesfully, a view as the one on figure 8 is displayed.

Figure 10: OMniLeads installation ended succesfuly
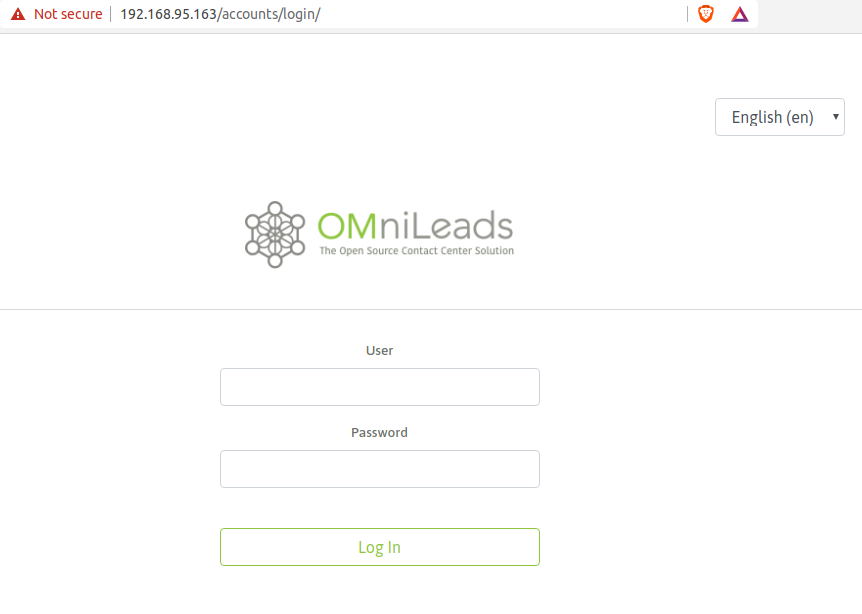
First access to OMniLeads:
To access the system go to web URL:
Important
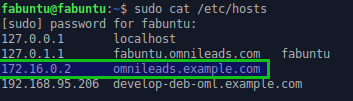
The web access to OMniLeads must be through hostname.domain of machine. So there are two possibilities for hostname resolving
- Network DNS do it
- Add hostname.domain in hosts file (Windows, Linux or Mac on each PC that is going to access OMniLeads.
In second case, you can edit the hosts file in the SO
Once selected the method to resolve the hostname of the OMniLeads instance, access the URL with any modern browser. Login with admin user and the password selected in the inventory file, as seen in figure:
Note
If you don’t remember the password you can check it here Environment variables.
Common mistakes:
- The server does not have internet or it does not solve domains (DNS configuration). Check the internet access of the host (eg. updating packages - apt-get update | yum update).
- Timeout of any package that you try to download. You can try again to execute the deploy and if it fails again, the option can be. Install the package from the terminal.
- Failure due to bad syntax or lack of definition of hostname and IP address in the file inventory. Check the file inventory
- The ssh access of the destination host of the installation was not configured. Review the firewall state. Check ssh remote access with the root user
- In case of having any Ubuntu-Debian host, remember that packages such as sudo, openssh-server or Python-minimal must be installed before running the script deploy.sh