Ansible Self-Hosted Install
When we say “Ansible Self-Hosted” we mean installing OMniLeads on an OS in a monolithic way (all services running on that host) and downloading the project on the OS destination of the installation, to execute the installation script from the own host later.
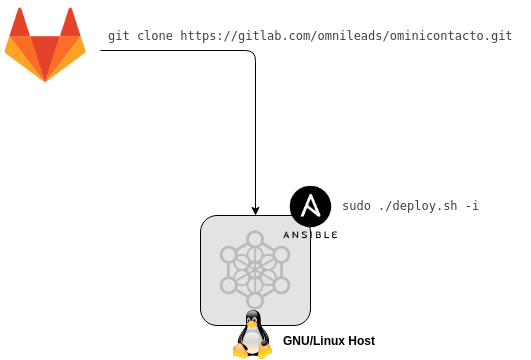
Figure 1: self-hosted install
Pre-requirements:
- A GNU/Linux CentOS 7 instance (minimal), Debian 9 (netinstall) or Ubuntu Server 18.04
- 20 GB of disk space
- 4 GB of RAM memory
- It is very important to leave the time correctly set on the host.
- Configure an IP address and a fixed hostname in the destination host of the installation.
Necessary adjustments before the script execution:
- We must have the git package to then clon the project repository and select the release to install
CentOS:
yum install git
git clone https://gitlab.com/omnileads/ominicontacto.git
cd ominicontacto
git checkout master
Install kernel-devel package, update the SO and reboot the machine
yum install kernel-devel -y
yum update -y
reboot
Important
After the reboot is very important to check that the kernel-devel package coincide with the kernel shown by the command uname -a
- The installation is worked in the “deploy/ansible” directory, available from the project root (PATH/ominicontact/deploy/ansible):
cd deploy/ansible
- In this step, the file inventory (PATH/ominicontac/deploy/ansible) must be edited.
Note
OMniLeads uses ansible to perform the installation, therefore there is an “inventory file” that must be modifies according to the parameters of the host we are working on.
In inventory file, check the variables of instance Passwords and parameters
Once adjusted all parameters in inventory file, proceed with the installation script.
Executing of the installation script:
The installation of OMniLeads is done using the script deploy.sh, located within the folder deploy/ansible respect to the root file of the project (omnicontacto).
Once the mentioned variables are configured, we proceed with the execution of the installation script (as root user or with sudo privileges):
sudo ./deploy.sh -i --iface=<your_iface>
Where <your_iface> is the interface with the IP address you want to use to raise up the services that compose OMniLeads (it usually is the LAN interface of the host).
Installation time will depend mostly of the internet speed conection of the OML host, since several packages correspondign to different software components that compose the system must be downloaded, installed and configured. Approximately this time is 20 to 30 minutes.
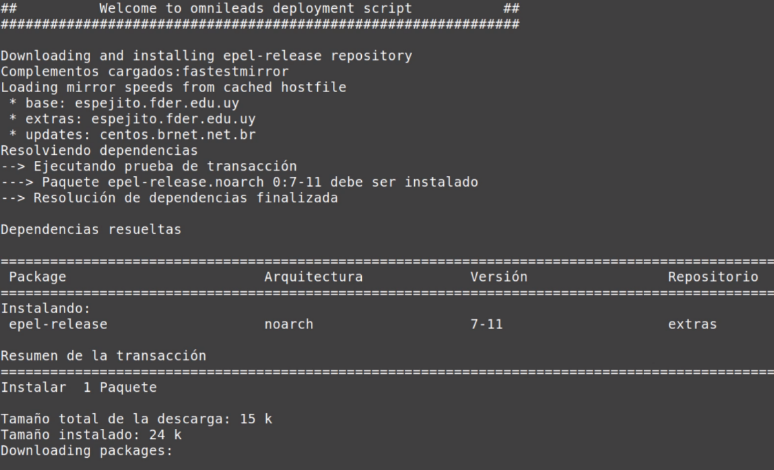
Figure 4: install running
If the installation execution ends succesfully, a view as the one on figure 5 is displayed.

Figure 5: OMniLeads installation ended succesfuly
First access to OMniLeads:
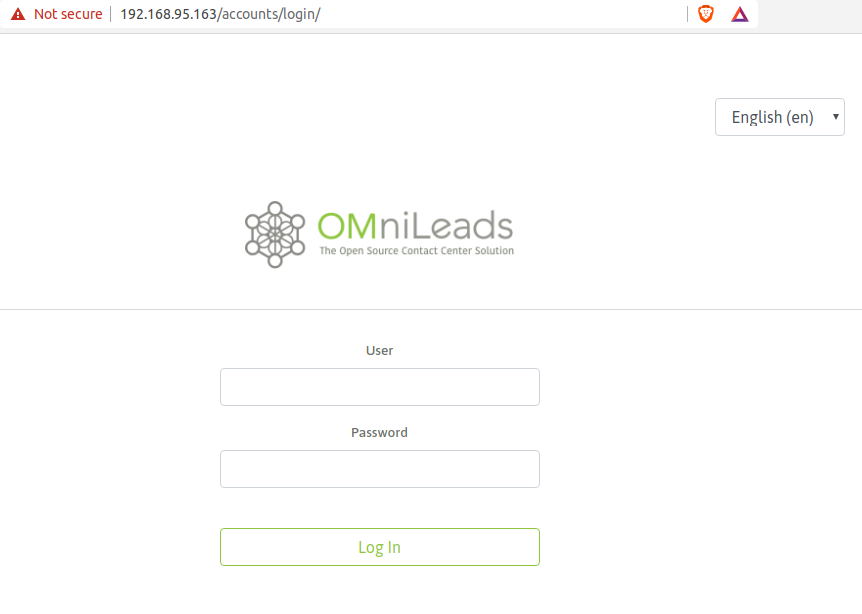
To access OMniLeads use the URL
Important
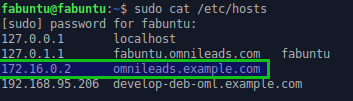
The web access to OMniLeads must be through hostname.domain of machine. So there are two possibilities for hostname resolving
- Network DNS do it
- Añadir el hostname.domain del host, dentro del archivo de hosts (Windows, Linux o Mac de cada PC que tenga que acceder a OMniLeads.
Add hostname.domain in hosts file (Windows, Linux or Mac on each PC that is going to access OMniLeads.
Once selected the method to resolve the hostname of the OMniLeads instance, access the URL with any modern browser. Login with admin user and the password selected in the inventory file, as seen in figure:
Note
If you don’t remember the password you can check it here Environment variables.
Common mistakes:
- The server does not have internet or it does not solve domains (DNS configuration). Check the internet access of the host (eg. updating packages - apt-get update | yum update).
- Timeout of any package that you try to download. You can try again to execute the deploy and if it fails again, the option can be. Install the package from the terminal.
- It does not execute the deploy script with sudo, in the deployer host.
- In case of having any Ubuntu-Debian host, remember that packages such as sudo, openssh-server or Python-minimal must be installed before running the script deploy.sh